How Recording Works
Learn how recording works in Confer, including Quick mode, Anchor Mode, Session mode, prompts, and paste behavior.
Last updated May 17, 2026
Confer supports three dictation modes: Quick mode, Anchor Mode, and Session mode. Each mode is designed for a different kind of workflow, so you can choose the one that best fits the task at hand.
Anchor Mode
This mode allows you to dictate without needing to hold shortcut keys. To begin dictation, press Option + Space, and Confer will begin recording audio at the bottom center of the screen.
Anchor Mode is useful if you need to gather additional context for your dictation, plan on having a longer recording, or switch between apps, screens, or desktops while dictation remains active. The recording time, visual waveform, and stop button are provided for your convenience.

Change prompts
Anchor Mode also allows you to change which prompt mode you are in.
By default the No prompt option will be selected. Clicking on this menu will show your list of prompts. 10 premade prompts are available in Confer, but you may add your own, modify the existing ones, or delete them as you see fit.
While in Anchor Mode, you may also use the shortcut Option + Up and Option + Down to select different prompts without using your cursor.
Change microphones
To change microphones, click the microphone button to the left of the prompts menu. A list of your available microphones will be shown here.
Stop or cancel dictation
To stop recording, press Option + Space again, or press the recording button while dictating. To cancel recording, press Esc, or press and hold the recording button, and drag it left.
Quick Mode
Quick mode provides a quick, press and release style experience for when you need to dictate. To begin dictation in Quick mode, press and hold the Fn key. A minimal audio recording panel will appear at the bottom center of the screen. Release the Fn key will end dictation.

Session Mode
Session mode keeps listening and turns each finished thought into text while the session stays open. Press Option + D to start it. Confer finalizes a spoken segment after about 2.5 seconds of silence, processes it, and pastes the result back into the app you are using.
Use Session mode when you are working in chat tools, writing multiple notes, prompting an agent, or talking through a task in several passes. You can pause and resume the session from the controls beside the recording panel.
Set Default Prompts
You may set default prompts for Anchor Mode and Quick mode depending on what app you have open. To do this, open the main Confer window by clicking the Confer icon in the menu bar, and clicking Open Confer, then go to the Apps page, and click Add App. From there you can select an app, and set default prompts for Anchor Mode and Quick mode.
Session mode uses the Anchor Mode prompt default for the current app.
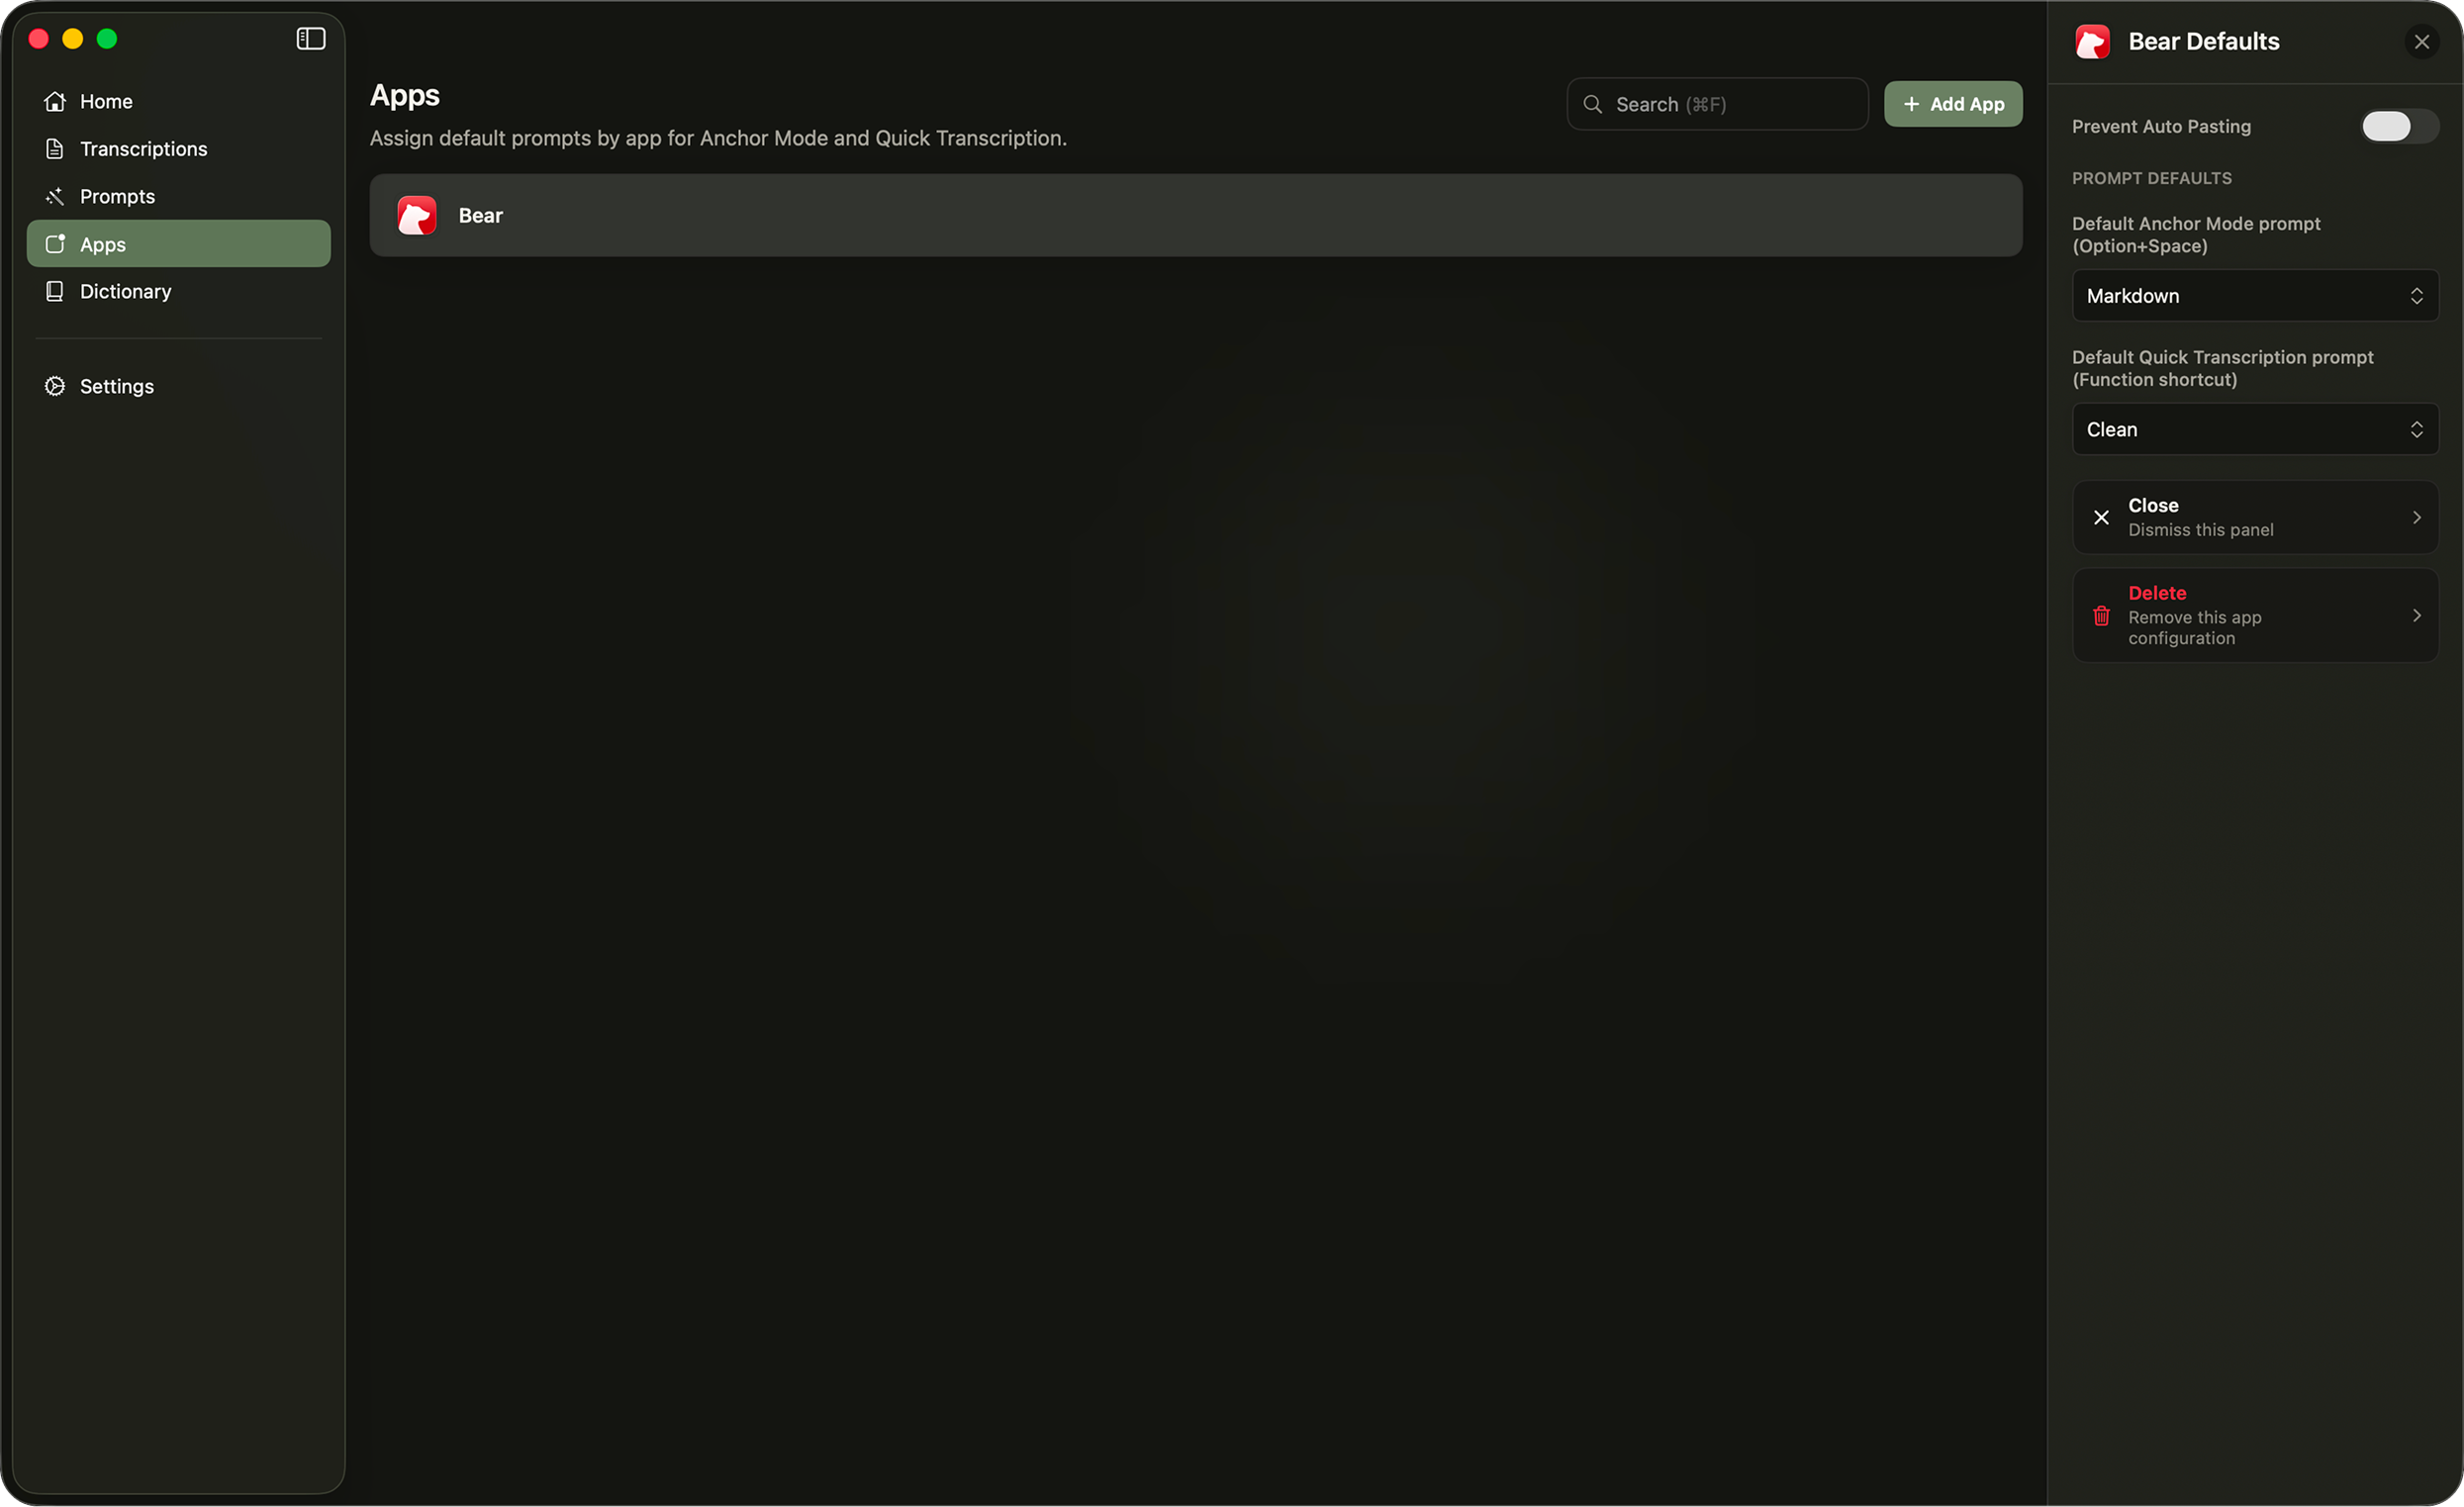
Disabling Auto Paste
In the same Apps screen, you may also enable the setting to prevent auto pasting in specific apps. To do this, select an app you would like to configure, then enable the Prevent Auto Pasting toggle in the sidebar.
Review Mode
If auto paste is disabled in the app you are in, or Confer determines the app doesn't have a focused field to paste in, Review mode will be shown. This view anchors itself to the bottom of your screen, and allows you to rerun the transcription with a different prompt, edit the generated transcription, and paste it when you're ready. You may also dismiss this with the close button in the top center of it.